Beets
Bulls Blood
Beta vulgaris L.
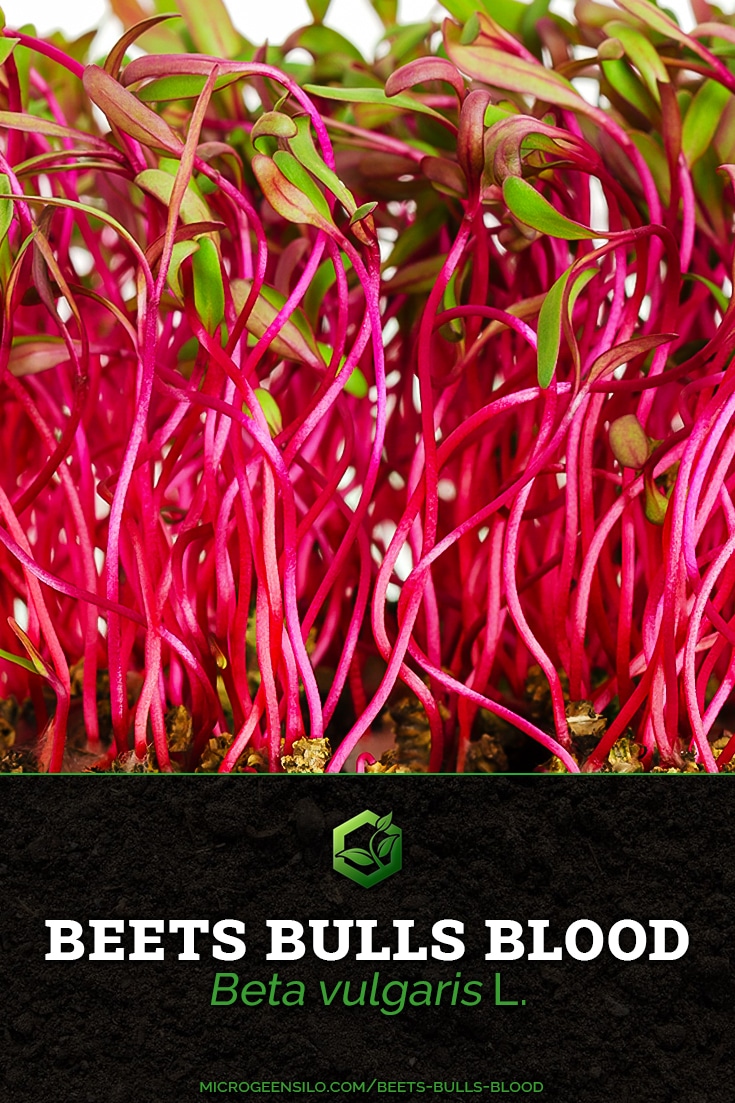
Beets Bulls Blood microgreens provide a burst of earthy beet flavor. They are great in salads, wraps, and sandwiches, adding a unique twist to your meals.
Quick Grow Info:
-
Scientific Name: Beta vulgaris L.
-
Flavor: Earthy, Beets flavor
-
Seed Rate: 30g-45g per 10″ x 20″ tray
-
Seeds Per in2: 0.15g-0.225g
-
Pre-Soak: 1-4 Hours
-
Weight Duration: 4-5 Days
-
Germination Time: 2-3 Days
-
Blackout Time: 1-2 Days
-
Seed To Harvest: 13-21 Days
-
Growing Difficulty: Moderate
Did You Know
Fun Fact
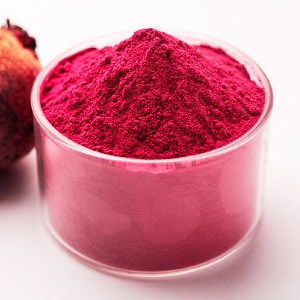
Beets contain a versatile compound called betacyanin pigment, which can be used as a natural dye for food and textiles, providing a sustainable and plant-based alternative to synthetic dyes.
Plant Details &
Grow Guide
Growing Beet Microgreens
Want to add a touch of elegance and a burst of earthy richness with a hint of sweetness? Look no further than beets microgreens!
Not only do they add a touch of sophistication to your plate, but they are also packed with nutritional goodness. In 13-21 days, you can grow a bed of these crimson gems.
Are you ready to experience the delicious and nutritious taste of beet microgreens? Let’s go and get our hands dirty!
Step 1 Preparing Your Seeds
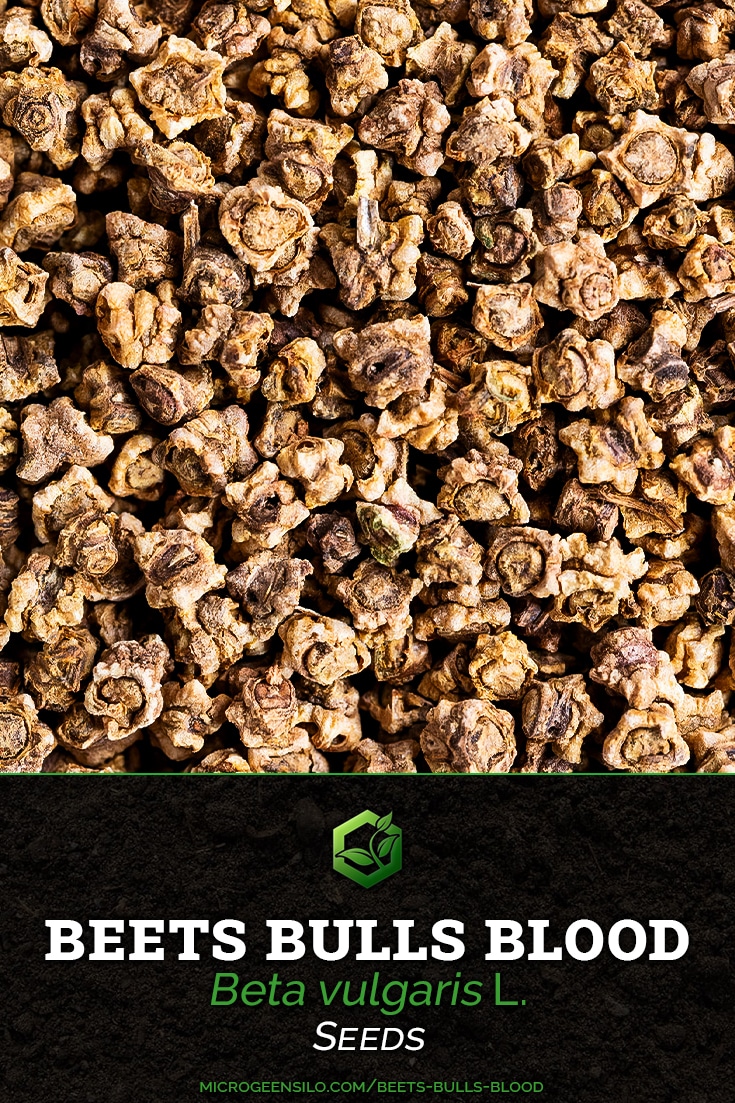
First, you need to measure your seeds using a scale. The best seeding rate for a 10″ × 20″ tray is 30-45 grams. If you plan to grow them in a 10″ × 10″ tray then simply divide the total amount by two, in this case, 15-22.5 grams.
If you’re a rebel like me, you can just eyeball it without weighing; just make sure that your seeds are approx ⅛-¼” (3-6mm) apart.
After measuring the seeds, it’s important to give them a thorough rinse under running water using a colander. This will help remove any dirt, dust or other contaminants that may be present on the seeds.
Personally, I like to soak the seeds in mason jars for around 1-4 Hours. Once that time has passed, I drain the water and rinse them under running water one last time and drain thoroughly.
Step 2 Sowing Your Seeds
To get started, prepare your growing tray by filling it with your preferred medium such as soil, potting mix, coco coir, or any other medium you prefer. But make sure to leave 1-2cm of empty space between the tray edge and the soil level.
This space between the tray edge and the growing medium is beneficial during harvesting as it reduces the risk of accidentally digging into the medium with your knife and contaminating your harvest.
Next, lightly mist your growing medium with a spray bottle to ensure it is damp but not overly saturated. Finally, evenly distribute your seeds across the medium, taking care to spread them out uniformly.
To finish off, I like to cover my seeds with a layer of vermiculite and another gentle misting so that it’s all covered with a fine mist of water.
Covering your seeds with a layer of soil or vermiculite aids in better germination, if you don’t have vermiculite, cover them with your grow medium.
Step 3 Germination & Weight Period
Take an empty tray without any holes and put it on top of the seeds you have planted. I usually use a 15lb (6.80kg) paving block for trays that are 10″ x 20″ or a 7lb (3.17 kg) brick for trays that are 10″ x 10″.
This method helps the seed radicle to penetrate the growing medium easily when it starts to emerge. Without any weight, the radicles may struggle to dig into the growing medium.
Remember that the seeds will start to sprout when they are covered and pressed down. Many people tend to mix up the germination and weight periods and mistakenly combine them, but this is not correct.
The purpose of the germination period is to provide an estimate of when the seeds will sprout. However, it is important to note that you should not add the germination time and blackout time together.
During the germination period, make sure to keep your growing medium moist while your seeds are weighed down. You can achieve this by gently misting your seeds every 12 hours. Once in the morning and once at night.
Step 4 Blackout Time
After allowing the seeds to rest for about 4-5 days, you should notice that they have germinated and the seedlings are now lifting the tray with the weight. It’s time to remove the weight and begin the blackout period.
Remove the weight from your empty tray and turn it upside down to create a dome that blocks out light. Place it back over your seeds.
Keeping them in darkness for around 1-2 days will encourage the newly sprouted seedlings to stretch and search for light, helping them grow taller. I prefer doing 1 day of black out.
Now you can start watering your beets microgreens from below. Simply add water to the drain tray at the bottom. Personally, I add 1 cup of water twice a day. Once in the morning and once in the evening (every 12 hours).
Once the blackout period of 1-2 days is over, you can remove the top tray or blackout dome and expose them to light. I’ve found that giving them 17 hours under lights followed by 7 hours of darkness works well for me.
Continue growing your beets for about 8-13 days, making sure to water them daily with 2 cups of water per day, spaced out every 12 hours.
Step 5 Harvest
Harvesting your microgreens is straightforward and only requires a sharp tool. Personally, I absolutely love using the Green Mercer Produce Knife—I highly recommend it! But if you prefer scissors, that’s also completely fine; just make sure they’re sharp!
Here’s an important tip to keep your harvest pristine: keep your chosen tool (whether it’s a knife or scissors) away from the soil! It’s imperative to avoid any accidental contact between the blade and the soil; you don’t want any unwanted dirt sneaking into your microgreen harvest and contaminating it.
It is crucial to follow this advice to guarantee that your harvested microgreens are of the highest quality and purity.
Plant Details & Taxonomy
Beets, derived from the Beta vulgaris species, have a unique and attractive profile.
These visually striking microgreens, exhibiting bright crimson hues and delicate leaves, make them a beautiful addition to any meal.
The flavor profile of beet microgreens is a well-balanced combination of earthy and subtly sweet flavors that enhance the taste of various dishes.
Due to their tender texture and unique taste, beet microgreens are a versatile culinary ingredient that can add depth to salads, sandwiches, and other gourmet preparations.
Whether you’re an experienced gardener or a beginner, these microgreens will bring joy and freshness to your dining experience.
| Rank | Scientific Name |
| Kingdom | Plantae – Plants |
| Subkingdom | Tracheobionta – Vascular plants |
| Superdivision | Spermatophyta – Seed plants |
| Division | Magnoliophyta – Flowering plants |
| Class | Magnoliopsida – Dicotyledons |
| Subclass | Caryophyllidae |
| Order | Caryophyllales |
| Family | Amaranthaceae – Amaranth family |
| Genus | Beta L. – Beet |
| Species | Beta vulgaris L. – common beet |
| Common Names | Beets, Beetroot, Table beet, Garden beet, Red beet, Golden beet, Chioggia beet, Sugar beet |
Microgreen Pests & Diseases
The following are the most common pests and diseases that can affect your microgreens.
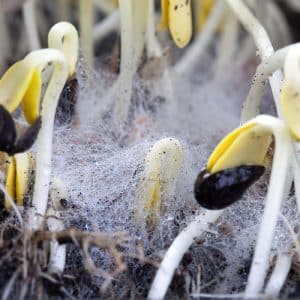
White Mold – Sclerotinia sclerotiorum
Sclerotinia sclerotiorum is a necrotrophic fungal disease that causes what’s known as white mold, it can infect over 400 plant species worldwide. It’s also called cottony soft rot, stem rot, watery soft rot, crown rot, and seedling blight.
S. sclerotiorum key properties are its ability to create sclerotia which are its black resting structures, and mycelium which are the white fuzzy spiderweb-like growths you see on stems and growing medium.
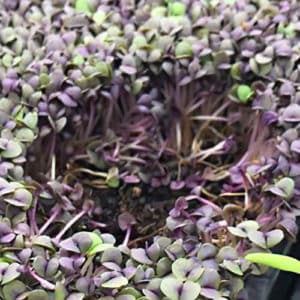
Damping Off
Damping-off is an umbrella term that covers fungi and fungi-like organisms in several genera including Rhizoctonia, Botrytis, Phytophthora, and Fusarium, with the soil fungus Pythium being the often culprit.
Damping-off is a soil-borne fungal disease that affects seeds and seedlings typically by rotting of the stems and roots at and below the soil surface.
When a seed germinates the seedling will emerge fine but within 24 hours to a few days will become mushy and water-soaked, collapse at the base of the stem and die.
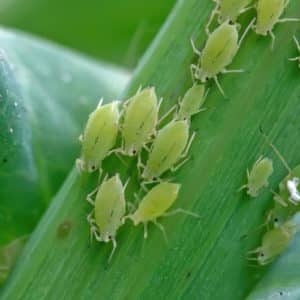
Aphids – Aphidoidea
Aphids suck! Quite literally. They’re soft-bodied insects that use their piercing-sucking mouths to feed on plants and there are over 4,000 aphid species in the world.
Other common names are greenflies, blackflies, and plant lice. They come in varying colors such as light green, black, white, brown, gray, or yellow.
When aphids feed on plants they secrete a sticky fluid which is called honeydew (no, don’t eat it). This goo they leave behind drips onto plants and can attract other pests such as ants. If the honeydew is left on leaves it can promote black sooty mold.
Beets Nutrition Facts
Bulls Blood beets are a great addition to your diet as they are rich in essential vitamins and minerals.
They are low in calories, with only 43 kcal per serving, and are a good source of dietary fiber.
Bulls Blood beets are cholesterol-free, contain significant amounts of Iron, Manganese, and Copper, and offer electrolytes such as Sodium and Potassium.
Although they are low in certain vitamins, including them in your diet can contribute to a balanced and nutritious diet.
| Principle | Nutrient Value | Unit | RDA |
| Energy | 43 | Kcal | 2% |
| Carbohydrates | 9.56 | g | 7% |
| Protein | 1.61 | g | 3% |
| Total Fat | 0.17 | g | 0% |
| Cholesterol | 0 | mg | 0% |
| Dietary Fiber | 2.8 | g | 7% |
| Vitamins | |||
| Choline | 6 | mg | 1% |
| Folate | 109 | mcg | 27% |
| Selenium, Se | 0.7 | mcg | 1% |
| Vitamin A | 33 | mcg | 44% |
| Vitamin B1 (Thiamin) | 0.031 | mg | 3% |
| Vitamin B2 (Riboflavin) | 0.04 | mg | 3% |
| Vitamin B3 (Niacin) | 0.334 | mg | 2% |
| Vitamin B-6 (Pyridoxin) | 0.067 | mg | 5% |
| Vitamin C | 4.9 | mg | 5% |
| Vitamin E | 0.04 | mg | 0% |
| Vitamin K | 0.2 | mcg | 0% |
| Electrolytes | |||
| Sodium, Na | 78 | mg | 5.20% |
| Potassium, K | 325 | mg | 6.91% |
| Minerals | |||
| Calcium, Ca | 16 | mg | 1.60% |
| Copper, Cu | 0.075 | mg | 8.33% |
| Iron, Fe | 0.8 | mg | 10.00% |
| Magnesium, Mg | 0.329 | mg | 0.08% |
| Manganese, Mn | 0.329 | mg | 14.30% |
| Phosphorus, P | 40 | mg | 5.71% |
| Potassium, K | 325 | mg | 6.91% |
| Zinc, Zn | 0.35 | mg | 3.18% |
| Phytonutrients | |||
| β-Carotene, beta | 20 | mcg | 0.50% |
| α-Carotene, alpha | 0 | mcg | 0.00% |
| Lutein + zeaxanthin | 0 | mcg | 0.00% |
Recommended Products
Explore my top curated picks for products needed to grow microgreens. Rest assured that all the featured items and products have been meticulously put to the test by me or have received glowing recommendations from my esteemed readers.
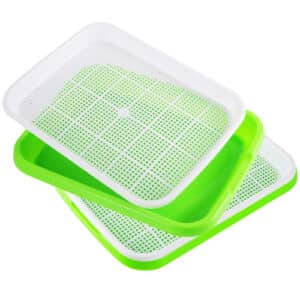
Microgreen Grow Trays
For my personal home use, these microgreen trays are my go to. Measuring around 12.2 x 9.06 x 1.77 inches (31 x 23 x 4.5 cm), these trays are perfectly suited for cultivating microgreens in a home microgreen grow room. What’s more, they’re durable, and cleaning them is a walk in the park, making them an all-around convenient choice.

1020 Microgreen Trays – Shallow Extra Strength Colors
Industry leading BootStrap Farmers 1020 microgreen trays! Designed with long lasting durability in mind, these colorful trays are built to withstand years of use and abuse. With a height of 1¼ inches (3.2 cm), these shallow trays make harvests easy, saving you time and increasing your yield. The trays come equipped with 36 drainage holes that effectively remove excess water, promoting a healthy growing environment and preventing mold growth. If you’re serious about growing microgreens and want the best trays available on the market, these trays are it!


Comments (2)
Milos,
We are Hardee Greens in SC and I have a question for you, for months now we have grown bulls blood beet with no problems. Now for some
reason, these past two weeks have been a disaster.
We have thrown out at least 50 trays, first batch died when we decided to skip a waterong cycle, ow this week the trays do not grow at all ( happy to share a picture) Do you have any advice?
ps temps in the building is around 85 degrees F
Thank you for taking the time to share your experience with growing Bull’s Blood beet microgreens. Your comment is much appreciated!
I understand that you are currently facing some challenges in growing beet bull’s blood, and I would be happy to provide personalized advice to help you overcome these issues (free of charge of course!). However, I would need more information regarding your growing setup and practices to do so.
To provide you with specific guidance and support tailored to your situation, please feel free to contact me through the “Contact Us” page. Once I receive your message, I will get back to you as soon as possible.
I am here to help and look forward to assisting you in getting your microgreens back to thriving condition.
Thank you again for reaching out, and I hope to hear from you soon!